How to Remove the White Background From a Logo
If your logo comes with a white box around it, take the box out in the editor and put only the logo on your photos.
- No account needed to start
- Up to 5,000 files per batch

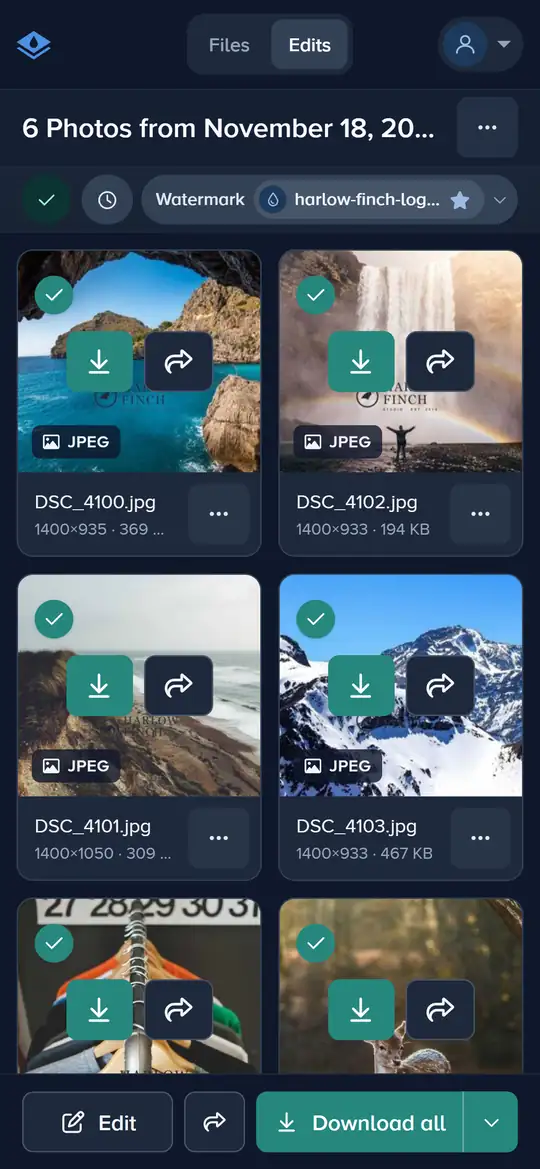
Add your logo in the Watermark tool, then switch on Remove Background: the white and near-white around it disappears. Raise Fuzz if a pale edge stays, use Blur to soften the cut, and apply it to your files. It is free to try in the editor; downloading files with it needs a paid plan.
How to Remove a Logo’s White Background in 4 Steps
It takes about two minutes, and you only do it once.
-
Step 1: Add Your Logo
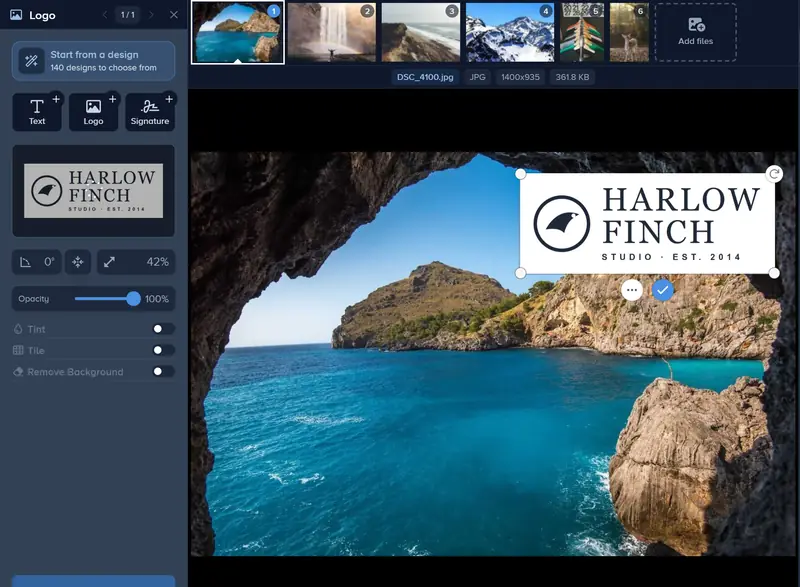
Select your files and click Edit. Open the Watermark tab, click Logo and upload your logo. A JPG works as well as a PNG.
-
Step 2: Switch On Remove Background
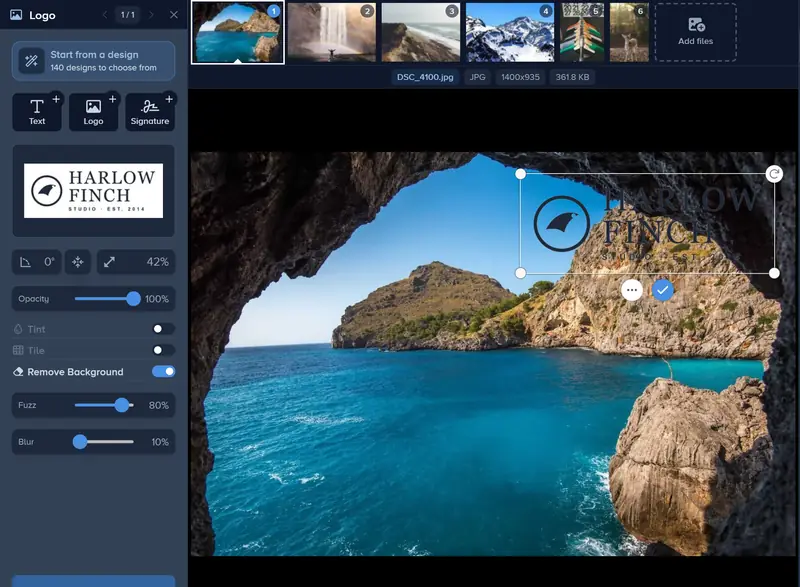
In the panel beside the photo, switch on Remove Background. The white around your logo disappears in the preview. On a phone, open the Background tab and switch on Remove background.
-
Step 3: Tune the Edge With Fuzz and Blur
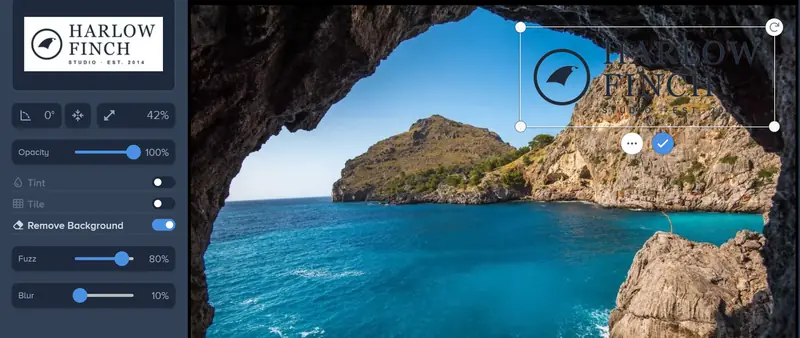
Fuzz sets how close to white a color has to be to go. It starts at 80%: raise it if a pale edge stays round the logo, lower it if light parts of the logo vanish too. Blur softens the cut edge.
-
Step 4: Apply It to Your Files
Place and size the logo, then click Apply and choose which files get it. Tick Save as template to keep the cleaned-up logo for next time.
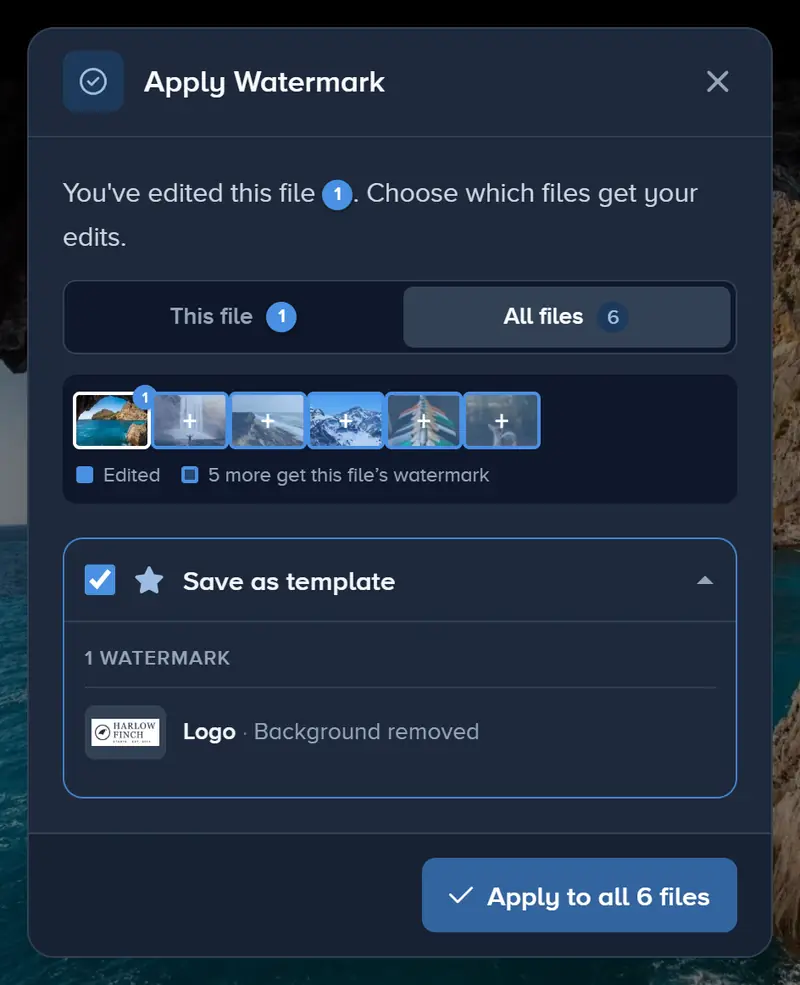
If It Doesn’t Look Right
A Pale Outline Stays
Raise Fuzz a few points at a time. The outline is pixels that are almost white, and a higher Fuzz takes them too. Check on a dark photo, where an outline shows most.
Parts of the Logo Vanish
Those parts are white or very light, so they count as background. Lower Fuzz until they come back, or upload a PNG of the logo with a transparent background.
The Background Isn’t White
Remove Background only takes out white and near-white. For a grey, coloured or photo background, save the logo as a transparent PNG where you made it, then upload that.
The Edge Looks Jagged
Raise Blur a little to soften it. A small logo file also looks jagged when stretched, so upload the largest version you have.
Questions people ask
Does Remove Background change my logo file?
Can I try it before I pay?
Do I have to remove the background every time?
Which logos work best?
Keep reading
 Guide
How to Batch Watermark Photos Online
Batch watermark up to 5,000 photos in one batch: design the watermark once, apply it to all, fix single photos and download a zip. Free to try, no install.
 Guide
Create a Signature Logo for Your Photos
Type your name, pick one of 30 handwriting fonts and swap letters for alternates. Free to design and preview; download it from the editor with Premium.
Guide
How to Watermark 100 Photos at Once
Add 100 photos to one edit, design the watermark on the first and apply it to all files in one click. Up to 5,000 files an edit, downloaded as one zip.
 Guide
Watermark Maker: Make Your Own Watermark Online
Make a text or logo watermark online with 600+ fonts, stroke, shadow, tiling and opacity. Free to design and try, nothing to install. No signup to start.
 Guide
How to Add a Watermark to a PDF Online
Add Draft, Confidential, your name or your logo to a PDF online, on every page with Premium. The file stays a PDF. No PDF editor or install needed.

Put Your Logo on Every Photo
Upload it, take out the white box, and apply it to a whole batch in one go.
Add your logo