On this page
Why One Watermark Breaks Across Different Crops
A watermark that looks perfect on a landscape photo can fail in three ways once the photo is cropped to a different aspect ratio. A watermark near an edge gets cut off. A watermark sized for a wide frame looks tiny in a tall one. And in 9:16 stories and reels, the top and bottom of the frame are covered by the app’s own buttons. The fix is the same for all three: put the watermark where every crop overlaps, size it relative to the frame, and crop before you watermark.
- Place it in the shared middle. Centered crops all keep the center of the photo, so a centered watermark survives square, 4:5 and 9:16.
- Size it by the short side. Keep the watermark about the same share of each frame’s shorter side, which means a larger share of the width on square and portrait shapes.
- Keep margins proportional, and keep 9:16 watermarks out of the top and bottom bands.
- Crop first, then watermark, and save one template per shape.
Find the Safe Zone Every Crop Keeps
When an app or a client crops a landscape photo to a narrower shape, the crop is almost always taken from the middle. Draw the common crops over the original and the area they all share is a vertical strip down the center. That strip, minus the top and bottom bands that phones cover in stories, is your watermark’s safe zone.
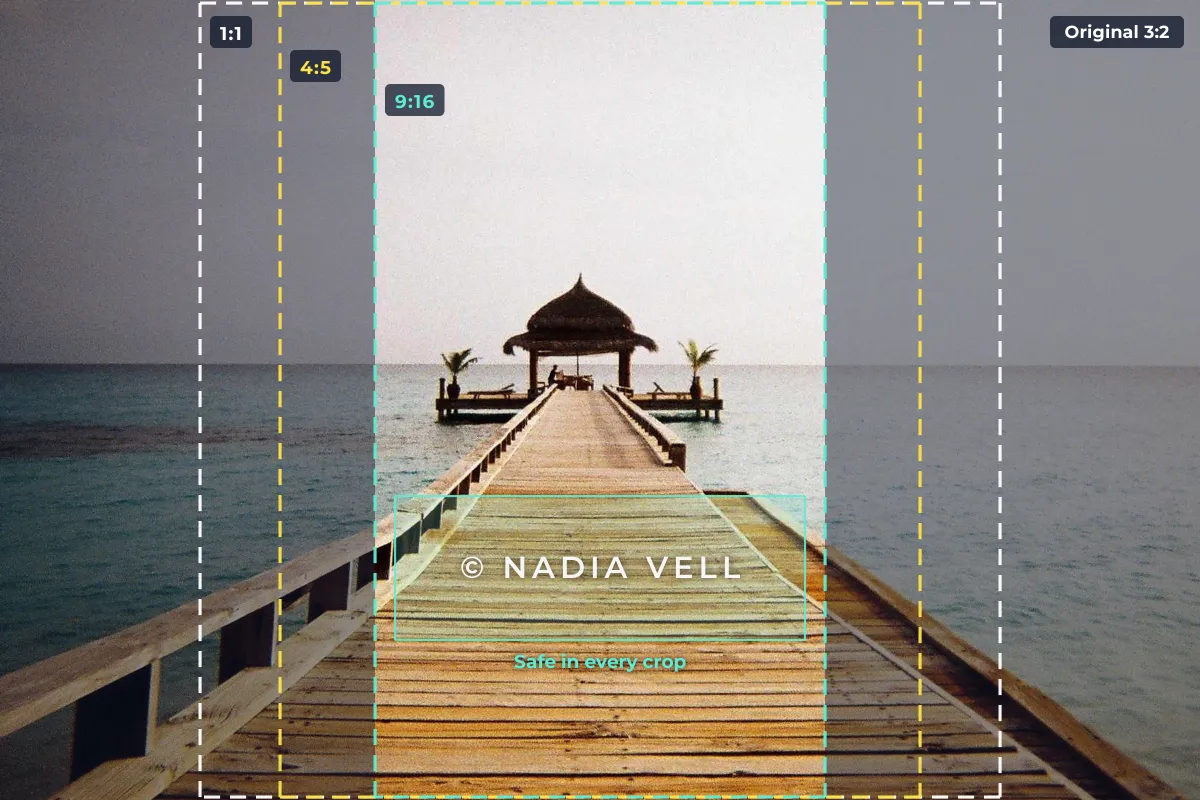
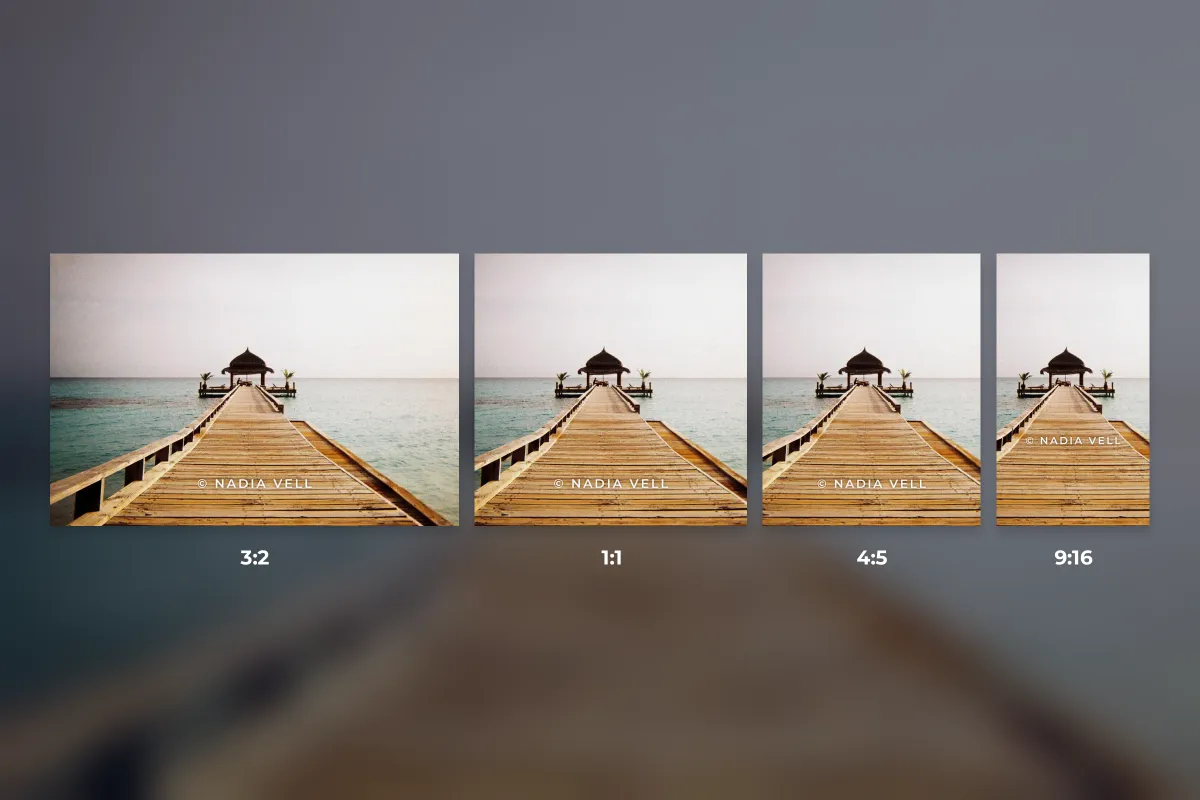
Here is what happens to a corner watermark placed on the full landscape photo, compared with one placed in the safe zone, when the same photo is cropped for each format:
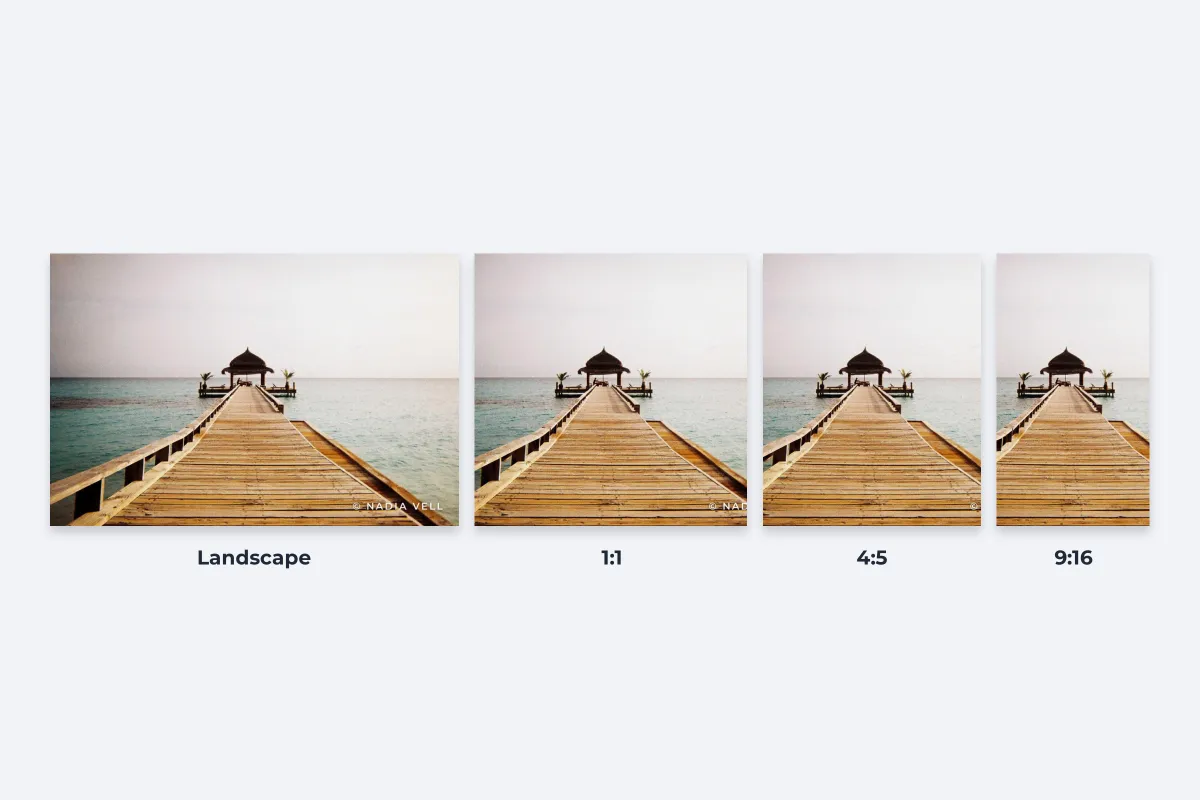 Corner watermark
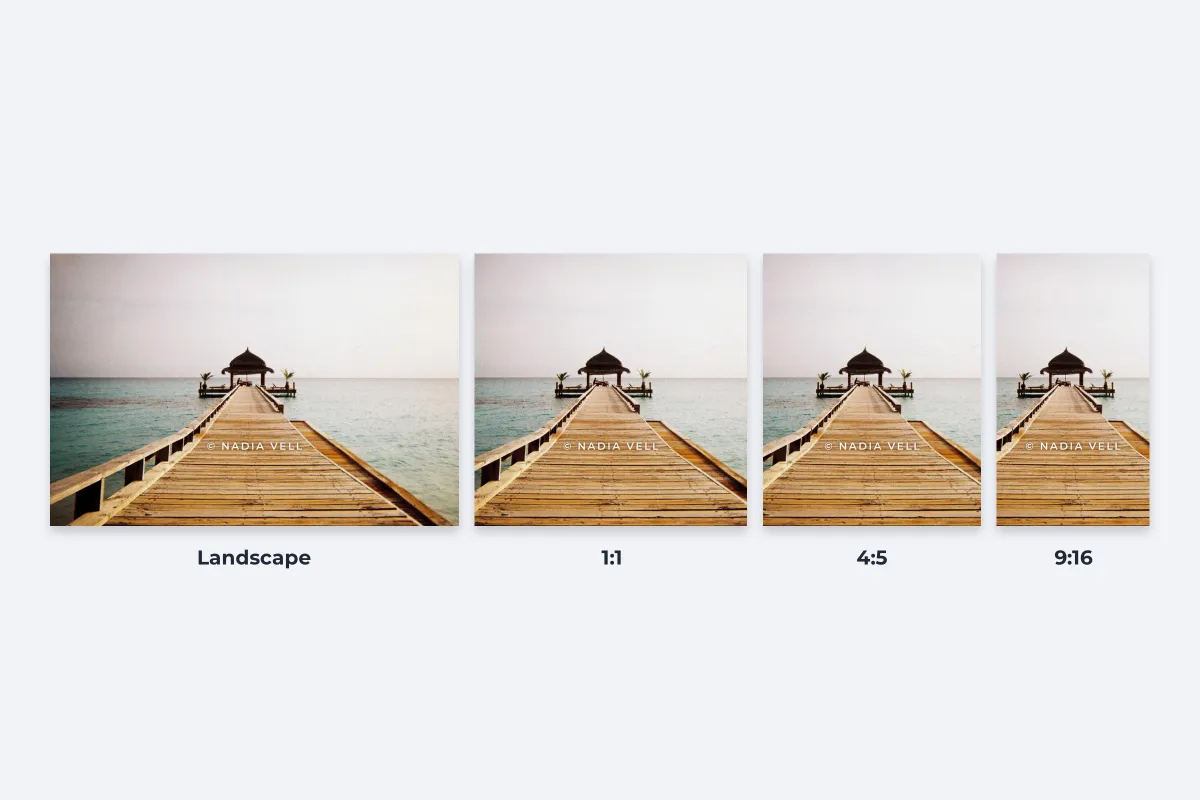 Safe-zone watermark
The corner watermark is cut in half by the square crop and gone entirely from the 4:5 and 9:16 versions. The centered watermark survives every one, and because it sits on the jetty it is also harder to crop out on purpose. For the trade-offs between positions, see where to put a watermark.
If your crops are shifted to follow an off-center subject, the safe zone moves with them. The rule becomes: keep the watermark close to the subject, because every sensible crop keeps the subject.
Size the Watermark by the Short Side
Watermark.ws scales a watermark with each photo’s width: a watermark that covers 30% of the preview’s width covers 30% of every photo’s width in the batch, whatever its resolution. That keeps sizes consistent between photos of the same shape. Across shapes, it has a side effect worth knowing about.
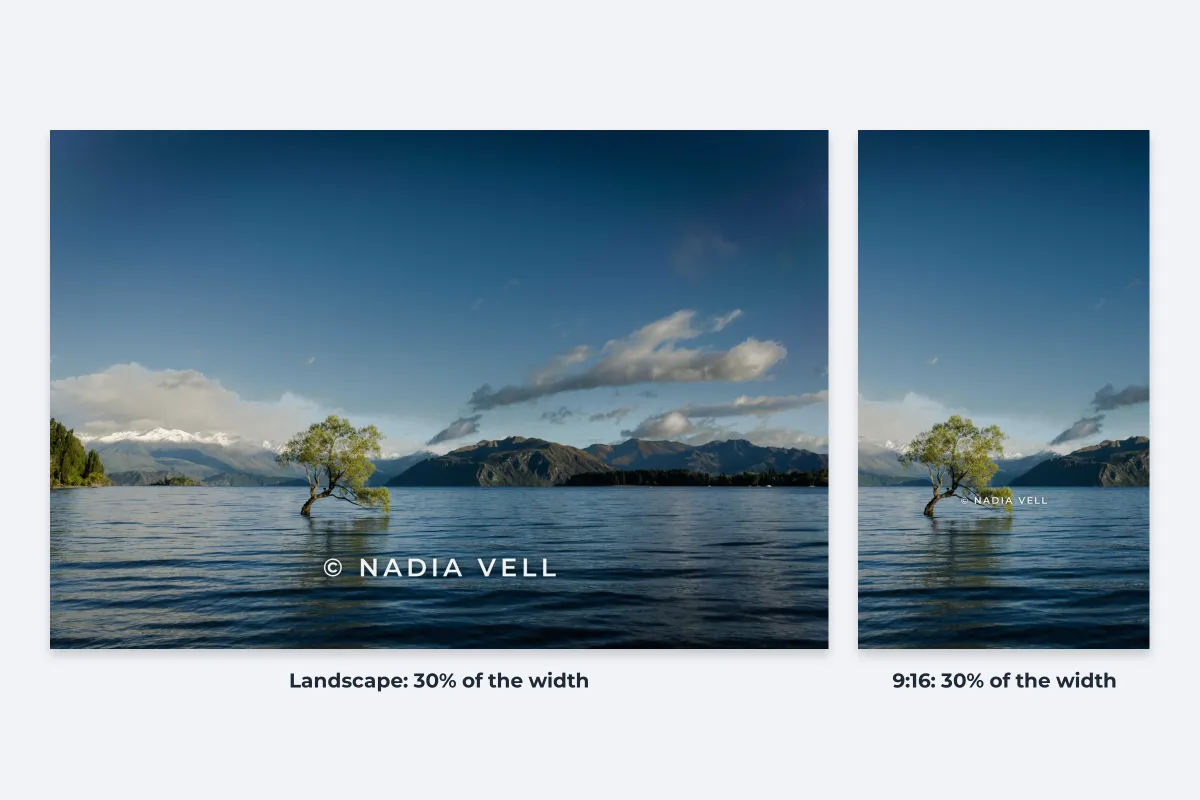 Same share of the width
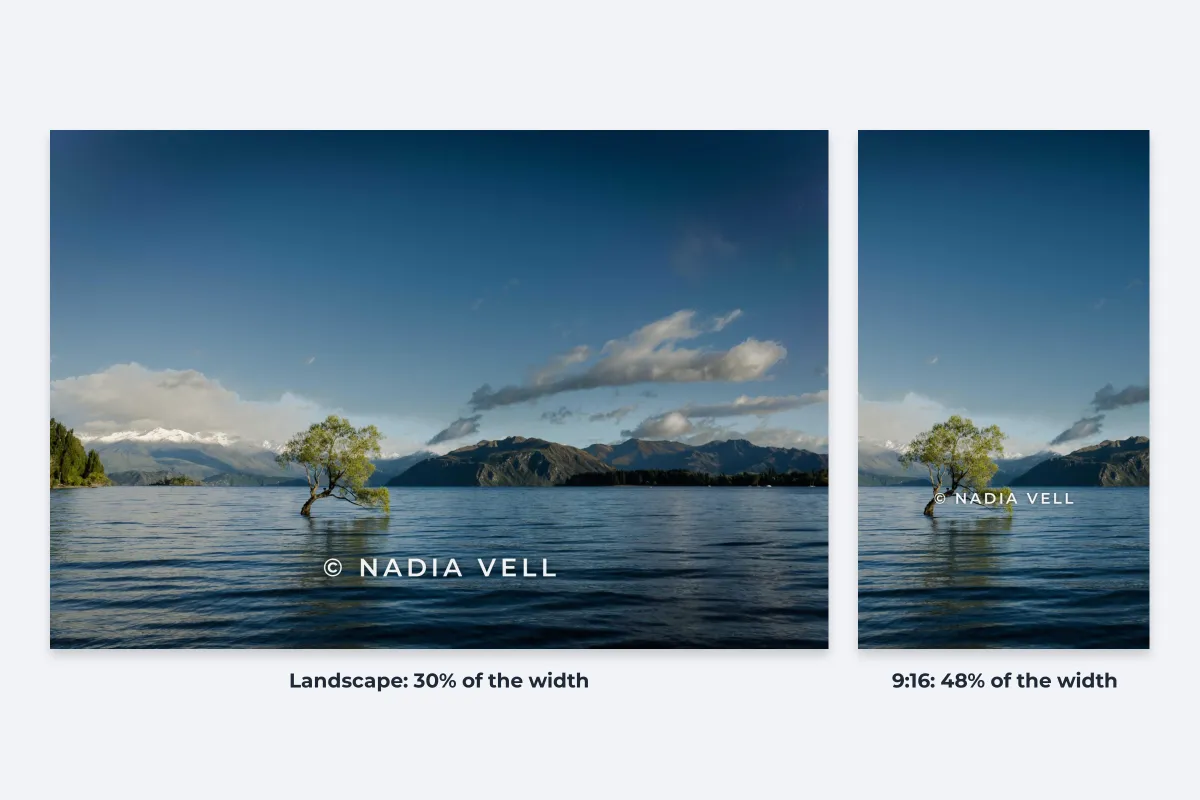 Same share of the short side
On a landscape photo, the width is the long side. On a square, portrait or 9:16 photo it is the short side, so the same percentage gives a visibly smaller watermark. The way round it is to think in terms of the short side: keep the watermark roughly the same share of each frame’s shorter edge. For a 3:2 landscape, that works out to about one and a half times the percentage when you switch to a square or portrait shape.
| Shape | Text watermark, as a share of the width | Where to put it |
|---|---|---|
| Landscape 3:2 | 25–30% | Lower middle, or over the subject |
| Square 1:1 | 35–40% | Lower middle, clear of the corners |
| Portrait 4:5 | 38–45% | Lower middle or beside the subject |
| Story or reel 9:16 | 45–55% | Middle band, about two-thirds of the way down |
These are starting points for a watermark over or near the subject. For a small corner credit, scale the ranges in how big a watermark should be the same way.
Keep Margins Proportional
The gap between the watermark and the edge matters as much as the size. A fixed 40-pixel margin is generous on a small export and a hairline on a 6,000-pixel original.
- Think in percentages. A margin of about 3–5% of the short side looks deliberate on every shape.
- Let the tool scale it. In Watermark.ws, the distance from the edge the watermark is anchored to scales with the photo along with its size, so the proportions you set on the preview carry through to the full-size download.
- Snap to the center when you can. A watermark snapped to the horizontal center stays centered on every photo, whatever its width.
- Give 9:16 extra room. Keep the watermark out of the top 14% and the bottom 35% of the frame, where stories and reels place names, captions and buttons. Watermarking Instagram Stories and Reels maps the safe area in detail.
Crop First, Then Watermark
The most reliable way to get a watermark right in every shape is to stop letting other people crop for you. If you upload a landscape photo and let a platform cut a square out of it, you are guessing where the watermark will end up. If you crop to the final shape yourself and watermark that, you see exactly what everyone else will see.
In Watermark.ws, the Crop tool has a square 1:1 preset and also takes an exact width and height in pixels, such as 1080 × 1350 for 4:5 or 1080 × 1920 for 9:16. The crop and the watermark apply to the whole batch, so every photo comes out in the same shape with the watermark in the same place. For platform-specific shapes and the profile grid, see watermarking photos for Instagram.
One Template per Shape
A single watermark setting can cover a batch of one shape perfectly. A batch that mixes shapes usually needs either per-photo tweaks or, better, a second template. A simple set covers almost everything:
-
Sort the batch by shape
Landscapes in one batch, portraits and squares in another, stories in a third.
-
Crop each batch to its final shape
Use the 1:1 preset or exact pixel dimensions.
-
Place the watermark in the safe zone
Lower middle for landscapes and squares, the middle band for 9:16. Size it by the short side, using the table above.
-
Save a template for each shape
Name them plainly, such as "Landscape", "Square and 4:5" and "Story 9:16", so the right one is easy to pick next time.
-
Fix the odd one out
If one photo’s subject sits under the watermark, adjust that photo on its own instead of changing the template.
For the rest of the routine, from folders to export sets, see a batch watermarking workflow that scales, or the step-by-step guide to batch watermarking photos.
Crop-Proof Watermark Checklist
- Keep the watermark inside the narrowest crop you will use.
- Size it as a share of the short side.
- Crop to the final shape before you watermark.
- Keep 9:16 watermarks in the middle band.
- Save a template for each shape you post often.
- Rely on a corner watermark when the photo will be cropped later.
- Use the same width percentage on landscape and 9:16.
- Hug the edge with a fixed pixel margin.
- Let a platform crop a photo you have already watermarked.
- Mix very different shapes in one batch with one setting.
Sample photos: Jetty and pavilion by May Pamintuan, Lone tree in a lake by Jasper van der Meij on Unsplash.